Amusement Equipment Product Molding Process Requirements
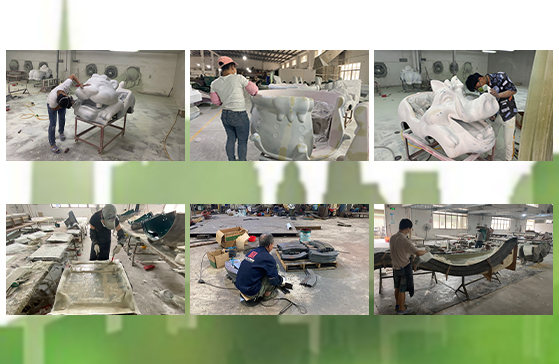
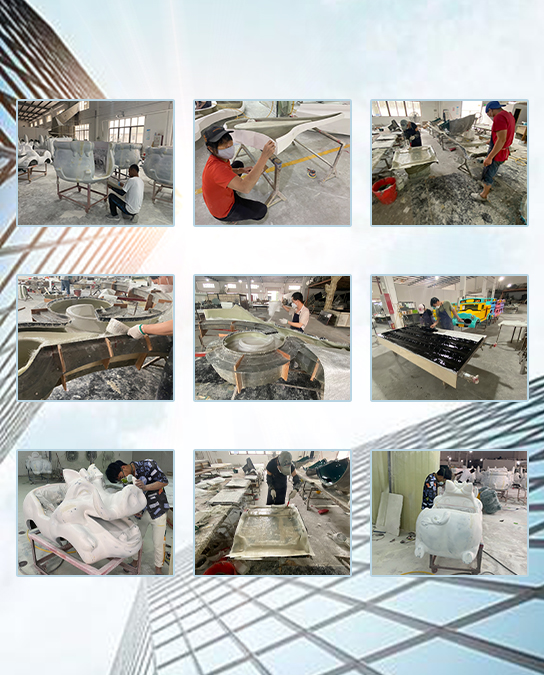
Product molding process requirements
- Molds suitable for the productsproductionmust be waxed carefully before use. First use a towel to coat evenly, and then use another towel to clean the wax traces on the surface of the mold.Make sure no wax traces remain on the surface of the mold;
- The gel coat should be evenly applied and not piled up. The gel coat of each product should be applied twice, and it must be free of pinholes, unevenness, and accumulation.When using gel coats of different colors for the same product, must make sure different colors cannot be mixed, and the dividing lines and product lines must be smooth, no strange shape, no waves, no jagged;
- It is strictly forbidden to use resin ash when forming the laminate. Individually needed products must be approved by the monitor and used under the guidance of the monitor, and resolutely prevent personal blind use;
- The molding operation must be careful, the deaeration must be thorough, the operation strength must be uniform, the use of resin must comply with the product usage, and can not be overuse. The placement of the fiber cloth (felt) can only be butt, not overlap (joint part). The corners and R parts must be dealt with carefully. Make sure the strengthening surface is flat, and no bubbles at the corners and R parts;
- The products out of mold must have clear and smooth lines, and no obvious bubbles, no fiber accumulation, no bulging, or no resin residue on the reinforced surface. The cut surface must be uniform in thickness and without layer separation;
- After the product is released from the mold, the following steps should be carried out: Self-inspection → monitor inspection → quality. If it is found that it does not meet the molding quality requirements, the person in charge must remedy it on site;
- Guarantee the demolding time of the product, do not demold in advance, and do not blindly use force during the operation, and do not damage the mold and product by knocking hard and unloading.


Painting process requirements
Polishing to remove wax
- Check if the product is bubbles or not. For the products with bubbles, remove the bubbles first. Then check whether the product gel coat is soft or wrinkled. If yes,first get rid of the soft (poor curing) part, then sand it with a 150# round emery cloth until the surface of the product is white and dull.Must sand it thoroughly, and if there are corners and recesses, they must be polished carefully to prevent the paint film from falling off when spraying the top paint. Concave and convex corners and line angles cannot be polished with a grinder, but can only be polished manually to avoid damaging the three-dimensional shape of the product surface.
Repair combined seams
- Clean the dust left by the polishing of the product, pay attention to the dust removal of bubbles, corners, and recessed parts. After the confirming there’s no dust, open the putty and repair it with a film or a ash knife. When adding ash, try to make the repaired surface flush with the product. Where the bubbles are too deep or too big, repair them twice. The filling putty should not be too high (the principle is a little higher than the surface of the product), so as not to waste materials and increase polishing time. After the putty is solidified, then perform the sanding process. The polished product must be flat, smooth and free of pinholes.


Refining and grinding treatment
- After polishing the product, use an air gun to blow off the surface dust, and then wipe the product with a wet towel. After removing the dry water, perform the primer treatment. Products after primer treatment must be carefully inspected. If find any bubbles and pinholes hidden in the gel coat layer,should use putty to repair them. After the gray surface is cured, use 180# Emery Cloth or 180# dry water sand for fine grinding. Re-grind the sandpaper patterns and uneven repair ash marks left by the grinding. Make sure that there are no obvious sandpaper patterns and repair marks on the surface of the product. After the self-inspectation is qualified, the painter will arrange to spray a white paint. On the one hand, it is easy to check, and on the other hand, it is to avoid the phenomenon that the unqualified before painting,and large area needs to be repaired and polished . This process is controlled by the monitor on site.For the products with many defects on the surface, white paint inspection should not be arranged. After polishing the products with white oil sprayed, the operators proceed careful, fine-graining and hand-processing, and then the team leader decides to hand over the next process of painting and color separation.
Spray paint
- After finishing the product, first thoroughly clean the grinding dust on the product, wipe the entire surface of the product with a clean wet towel, and wait for the moisture to dry. The paint spraying place must be clean and with no dust, and the ground must be watered frequently. The topcoat must be sprayed twice, and the interval should not be too short. (This requirement shall be mastered by the monitor and spray painters on site). The paint film should not be too thick to avoid tear marks, wrinkles, and sand spots after drying. After the last color is cured, the second color can be interlaced. The specific processing is performed according to the product’s own requirements. The interlaced newspaper should ensure that the lines are neat and smooth, and cannot be bent, crossed, offline, unsmooth lines or separation of tape or newspaper. Cover and seal the sprayed part completely, then use 180# white dry water sandpaper or 180# old emery cloth to polish the area to be sprayed again, remove the dust, and spray it after confirming that it is clean. After spraying, tear off all tapes and newspapers. Take care during the operation not to damage the topcoat. For the line part of the product, a white cloth containing thinner must be used for line trimming and variegated treatment of the first color. Products with more colors are operated in accordance with the second paint process.
Product overshading
- If need to polish the product, after the above process is completed, after curing, check if there’s there is sand point on the surface.If there’s sand point,use water sand above 600# to gently remove it. Then use a clean wet towel to wipe off the dust, and use a spray gun to clean the surface of the cotton yarn and dust. After confirm it’s clean, athen can do the overshading. During the operation, the surrounding and the site must be clean and dust free. To control the thickness of the varnish film, the operation can be divided into 2 operations to avoid the occurrence of varnish flow marks and sand spots after curing or insufficient surface gloss of the product.
FRP process flow
- FRP fiber raw materials|Raw material processing|Fiber be attached to the mould|Component polishing|Coloring|Finished product polishing|Spraying.


